
photo by mkhmarketing (CC)
Social media is more important in the world of online marketing than ever. Nearly every business can justify having a presence on social networks, whether it’s a Twitter account, several boards on Pinterest, or a Facebook Page. Facebook continues to be the social media network of choice for many brands and companies, and it’s with good reason: the platform makes it easy for brands to engage with their fans and followers, and makes two-way communication both easy and public (which definitely helps with your perception for potential customers).
If you want to create a Facebook Page for your business but aren’t sure how to do it or where you should start the process, we’re here for you. We’ve put together this simple guide to help you get started in just a few minutes. Read on to learn how to create a Facebook business page in seven easy steps.
1. Locate the “Create a Page” option
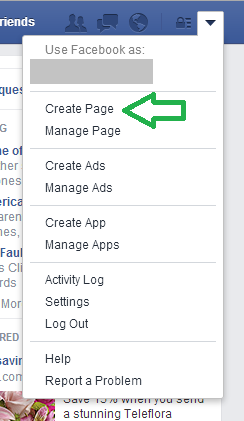
You’ll need to have a personal Facebook account before you begin. This account is what you will use to manage your business Page, so be sure you know the login information, have a secure password, etc. before beginning.
Once you’re logged into your own Facebook account, click the triangle icon in the upper right blue bar (to the right of your “Home,” “Find Friends,” etc. options) and select “Create Page” from the menu.
2. Select your business type
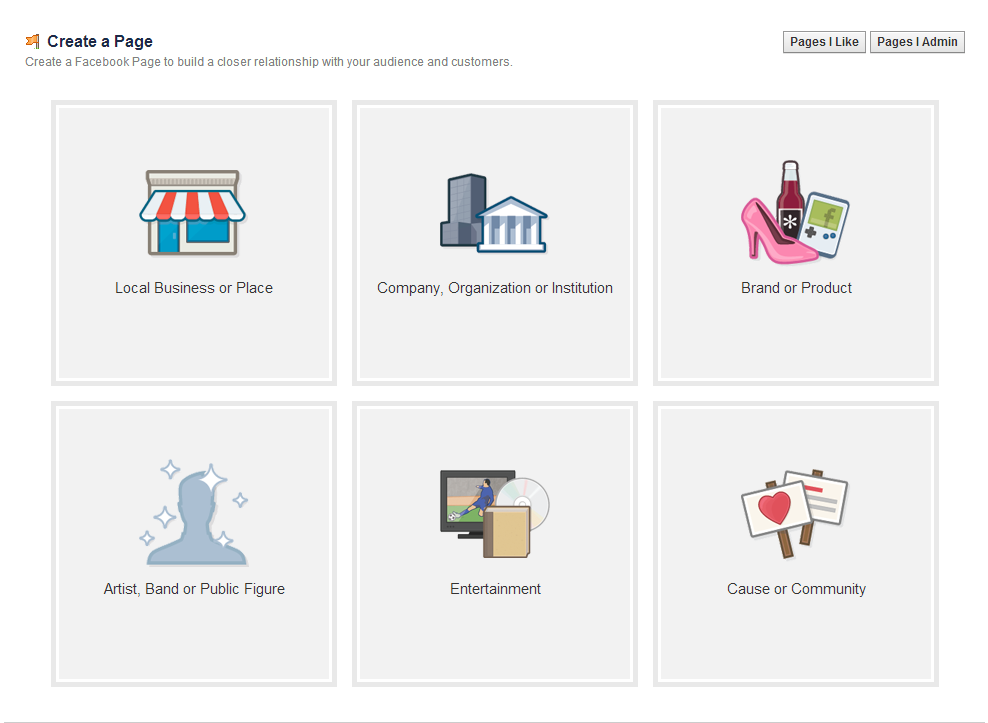
This will take you to a page where you will be prompted to select the type of page you’ll be creating. For the most part, your business will probably need to stick to one of the top three items. A few tips to help you decide what is right for you:
- The “local business or place” option is designed for physical storefronts that can be visited by customers. So if you have a business or warehouse address but don’t actually sell products to those who walk in off the street, you shouldn’t choose this option.
- “Brand or product” applies to manufacturers who sell their own products online — for example, a manufacturer of juicers who runs a store to sell just their juicers.
- The middle option is probably the best for online storefronts who sell a variety of items and are trying to create a personal “brand.”
3. Fill out some basic information
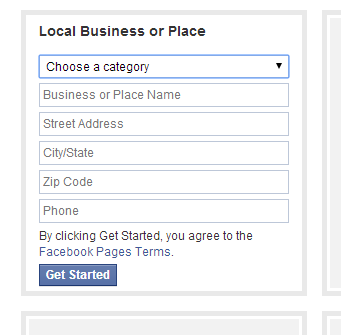
Once you’ve selected your business option (we chose “local business”), you’ll be prompted to add a few crucial details, like your address and phone number, before you get started.
4. Add additional business details
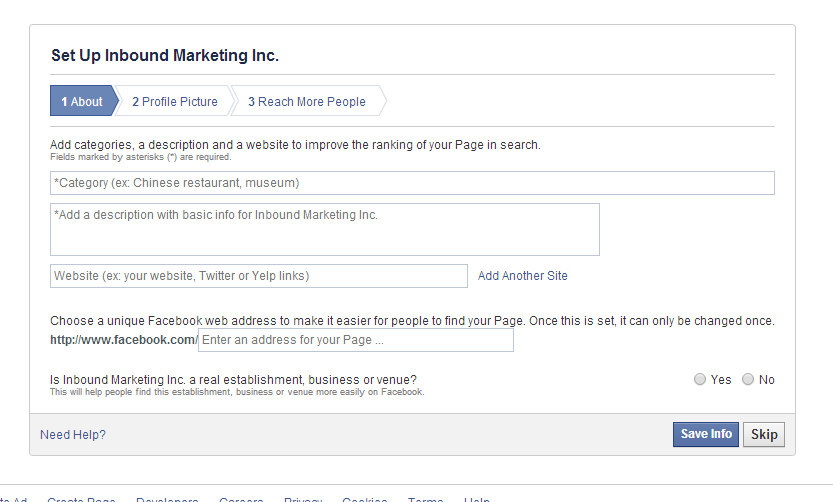
Now you’ll give Facebook some additional information, like the URL to your website (if you have one), the URL you want for your Facebook page, and so on. Make sure you click “yes” to the right of the final question — you definitely want your business to be found on Facebook!
5. Upload a logo or brand image
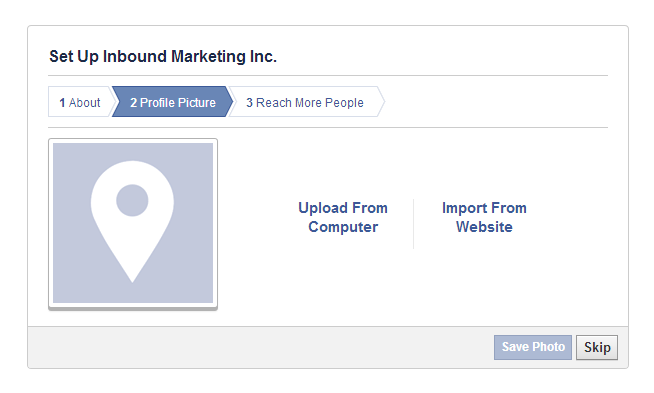
Upload a logo, image, or other brand asset here to represent your Page on Facebook. Much like user profile photos, this will be reduced to a square thumbnail that appears in feeds, and in other important places.
6. Set up ads (if desired)
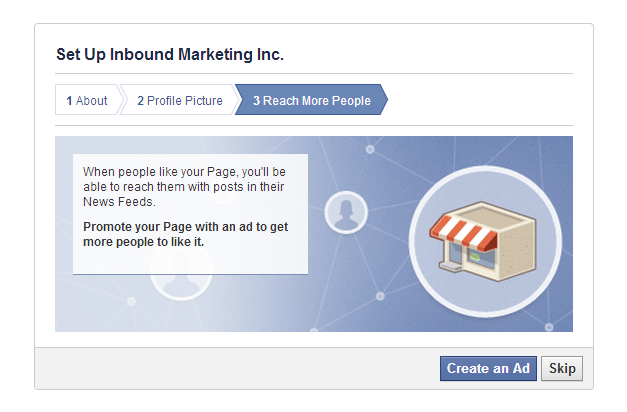
You can skip this step for now unless you really want to kick things off with an ad. Facebook has PPC advertising options that can drive Likes to your Page, which you can create from this step. However, we recommend setting up your business page completely and posting a few updates before you do any advertising — otherwise users may immediately bounce from the mostly-blank landing page.
7. Start posting to your Facebook Page!
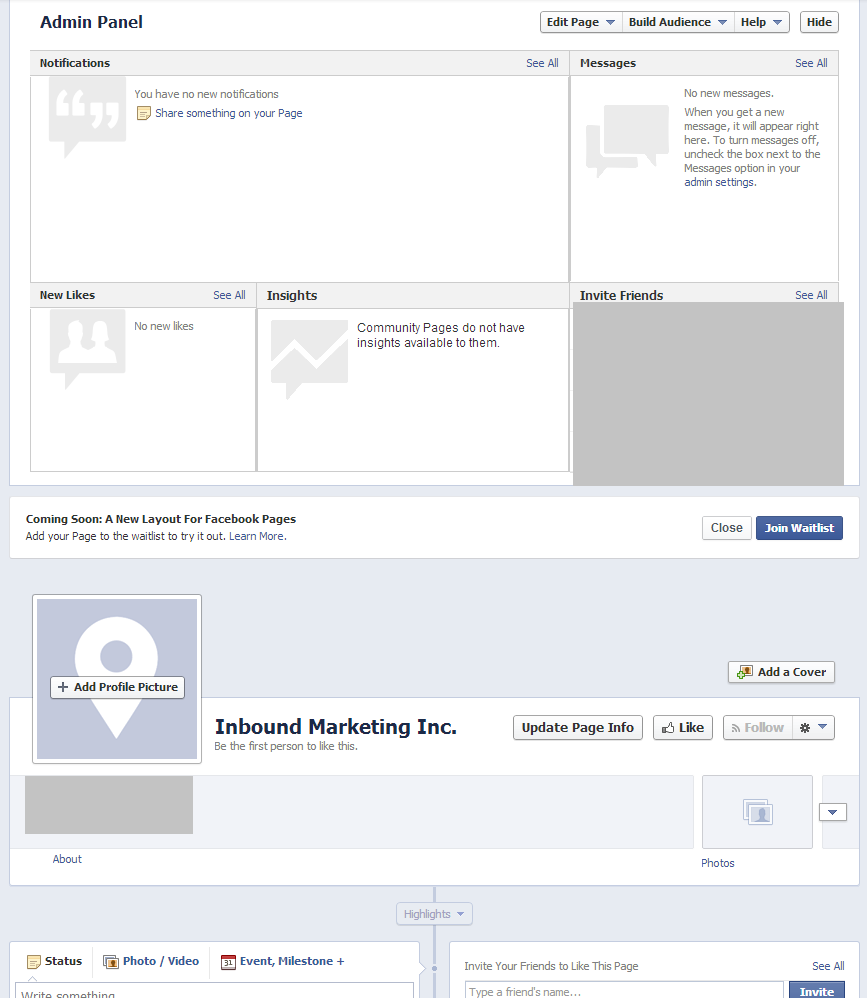
With this final step done, you’ll be taken to your new Facebook Page! Congratulations! From here you can start posting updates, sharing photos or videos, setting up events, and so on. Make sure you invite your friends and family to Like the page — and Like it yourself! — so you can start building an audience.
We hoped this guide showed you how to create a Facebook business page quickly and easily. With your new page up and running, it’s time for you to attract fans, engage with them, and use your social media presence to grow your brand online. Not sure how to do it? Feel free to contact us at any time for a free quote on social media management and other inbound marketing services.